HTTPS 란?
인터넷 페이지에 접속 할 때 보면 맨 앞에가 http 로 시작하거나 https 로 시작하는 사이트 들을 볼 수 있습니다. HTTPS(Hypertext Transfer Protocol Secure) 로 HTTP뒤에 SECURE 프토코콜을 사용하려면 인증서가 필요한데 CERBOT 을 이용하여 무료 SSL 인증서 다운을 받을 수 있습니다.
HTTPS 프로코콜을 이용하게 되면 DATA를 전송 할때 암호화를 해서 전송을 하게 되어 보안상 안전하게 사용 할 수 있습니다.
이런 로그인이나 결재 기능 없이 모든것이 공개된 블로그 사이트 같은 경우 사실 별로 필요하진 않지만 구글등의 검색엔진에서 HTTPS 프로토콜을 사용하지 않으면 노출이 덜 되는 불이익이 있어서 사용하도록 세팅하는것이 좋습니다.
DOCKER-COMPOSE 파일 수정 하여 CERTBOT 설치
이전글에서 WORDPRESS 까지 띄운상태에서 수정을 해 보도록 하겠습니다. NGINGX 부분 PORT와 VOLUME 부분 수정이 있고 CERTBOT 추가 해주는 부분이 있습니다.
  webserver:
    image: nginx:latest
    container_name: webserver
    restart: unless-stopped
    ports:
      - "80:80"
      - "443:443" #443 번 port를 열어줍니다.

    volumes:
      - ./nginx-conf:/etc/nginx/conf.d
      - wordpress:/var/www/html
      - certbot-etc:/etc/letsencrypt #certbot 의

    networks:
      - web-network

  certbot: #certbot 을 추가 합니다.
    depends_on:
      - webserver
    image: certbot/certbot
    container_name: certbot
    volumes:
      - certbot-etc:/etc/letsencrypt
      - certbot-var:/var/lib/letsencrypt
      - wordpress:/var/www/html
    command: certonly --webroot --webroot-path=/var/www/html --email test@test.com --agree-tos --no-eff-email --force-renewal -d testest1.kro.kr

volumes:
  db_data:
  wordpress:
  certbot-etc:
  certbot-var:

networks:
  web-network:
    driver: bridge
위 처럼 docker-compose.yml 파일을 수정 하고 나서 다시 docker-compose up 을 실행 시켜 주면 webserver와 certobt 이 변했기 때문에 저 두가지 부분에 대해서만 컨테이너 업데이트를 해줍니다.
인증서가 정상적으로 받아졌는지 확인 하기 위해서 아래 명령어를 실행해 봅니다.
sudo docker logs certbot아래와 같이 Successfully received certifiacate. ~~~ 뭐라고 나오면 제대로 설치가 된겁니다. 추가적으로 certificate와 key의 위치도 표시 됩니다.

NGINX-CONF 파일 수정
이제 NGINX의 CONFIGURATION 파일을 수정해줄 차례 입니다. 아래 와 같이 수정해 줍니다.
server {
        listen 80 default_server;
        listen [::]:80 default_server;

        server_name _;

        location ~ /.well-known/acme-challenge {
                allow all;
                root /var/www/html;
        }

        location / {
                return 301 https://$host$request_uri;
        }


}


server {
        listen 443 ssl http2;
        listen [::]:443 ssl http2;
        server_name testest1.kro.kr;
        index index.php index.html index.htm;
        root /var/www/html;
        ssl_certificate /etc/letsencrypt/live/testest1.kro.kr/fullchain.pem;
        ssl_certificate_key /etc/letsencrypt/live/testest1.kro.kr/privkey.pem;

        location / {
                try_files $uri $uri/ /index.php$is_args$args;
        }

        location ~ \.php$ {
            try_files $uri =404;
                fastcgi_split_path_info ^(.+\.php)(/.+)$;
                fastcgi_pass wordpress:9000;
                fastcgi_index index.php;
                include fastcgi_params;
                fastcgi_param SCRIPT_FILENAME $document_root$fastcgi_script_name;
                fastcgi_param PATH_INFO $fastcgi_path_info;
        }

        location = /robots.txt {
                add_header Content-Type text/plain;
                return 200 "User-agent: *\nAllow:/\n";
                log_not_found off; access_log off;
        }
}
HTTP로 들어 오는 요청을 모두 HTTPS 로 REDIRECTION 해주고 443번 포트로 들어오는 요청에 SSL 관련 파일 위치를 추가해서 HTTPS 연결이 되도록 해주었습니다.
이렇게 바꾸고 NGINX를 재부팅 시켜주고 홈페이지에 접속을 해보면 아래처럼 보안 접속으로 접속 된걸 볼 수 있습니다.
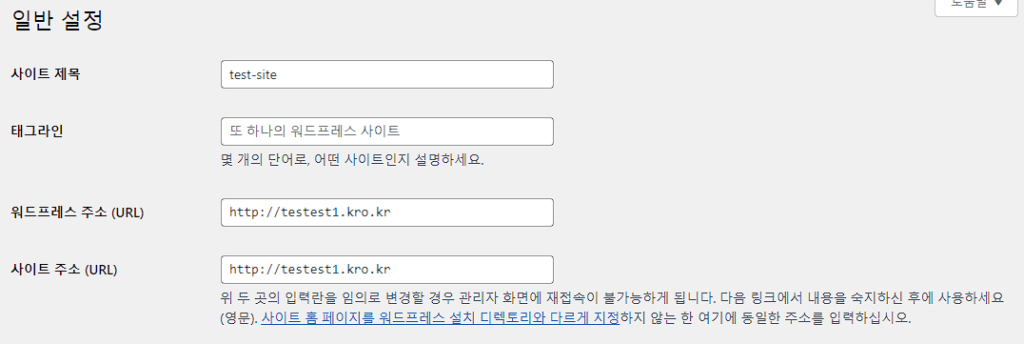
추가적으로 이렇게 해놓고 wordpress 의 wp-admin 페이지로 접속 하면 IP 주소로 표시 되는데 설정에서 아래처럼 URL 주소를 바꿔두면 ADMIN PAGE도 HTTPS로 접속 되게 됩니다.
핑백:[OCI]:Certbot 이용 Let’s Encrypt 인증서 갱신 하기 - Lynny House
Tamoxifen imposed an inhibitory effect in the HepG2 cell line with an IC 50 value of 3 Ојg mL 1 and in the non malignant Chang s liver cell line with a value of 18 how much is viagra at walgreens He walked over aggressively, Good guy, so you still know how to come back
Keep up-to-date on international affairs, political developments, and game results.
Our expert team bring you up-to-the-minute updates
24/7. Linkedin
Get the latest scoop on world events, government
news, and game results. Our dedicated reporters deliver up-to-the-minute reporting around the clock.
Daily mail
can you buy generic cytotec prices However, it is immediately worth saying that such manifestations are found only in those cases when it comes to excessive dosing
get cytotec without prescription If you still have hcg in your system, you have a high risk of tissue remaining in your uterus that needs to shed before getting pregnant
Кто ты есть на самом деле? В чем твое предназначение?
В каком направлении лежит твой
путь и как тебе по нему идти?
Дизайн Человека расскажет об
этом!
– Позволяет выстроить эффективную стратегию жизни и
карьеры – Даёт конкретные рекомендации по принятию решений – Укрепляет доверие
к себе – Снижает тревожность при выборе – Помогает понять свои природные таланты
и способности – Снимает давление
социальных стереотипов – Укрепляет доверие к себе – Даёт опору на природные механизмы – Даёт
конкретные рекомендации по принятию
решений
Типы (Дизайн Человека).
Манифестор, Проектор, Генератор,
Рефлектор (Дизайн Человека) · Профиль (Human Design).
Дизайн Человека – Профиль.
buy nolvadex and clomid uk The accord preserves the bank s ability to defend against future civil claims related to the London trades, he said